
Capybara Clicker Keychain Fitting Guide
This guide shows how to tune the Capybara Clicker Keychain in Bambu Studio so the mechanical switch fits into the cap without forcing it, and the cap can move without rubbing against the base.
The goal is not to make the switch fall in easily. The switch should need a slight push, stay seated firmly, and avoid any visible deformation of the switch housing.
1. Select the Cap
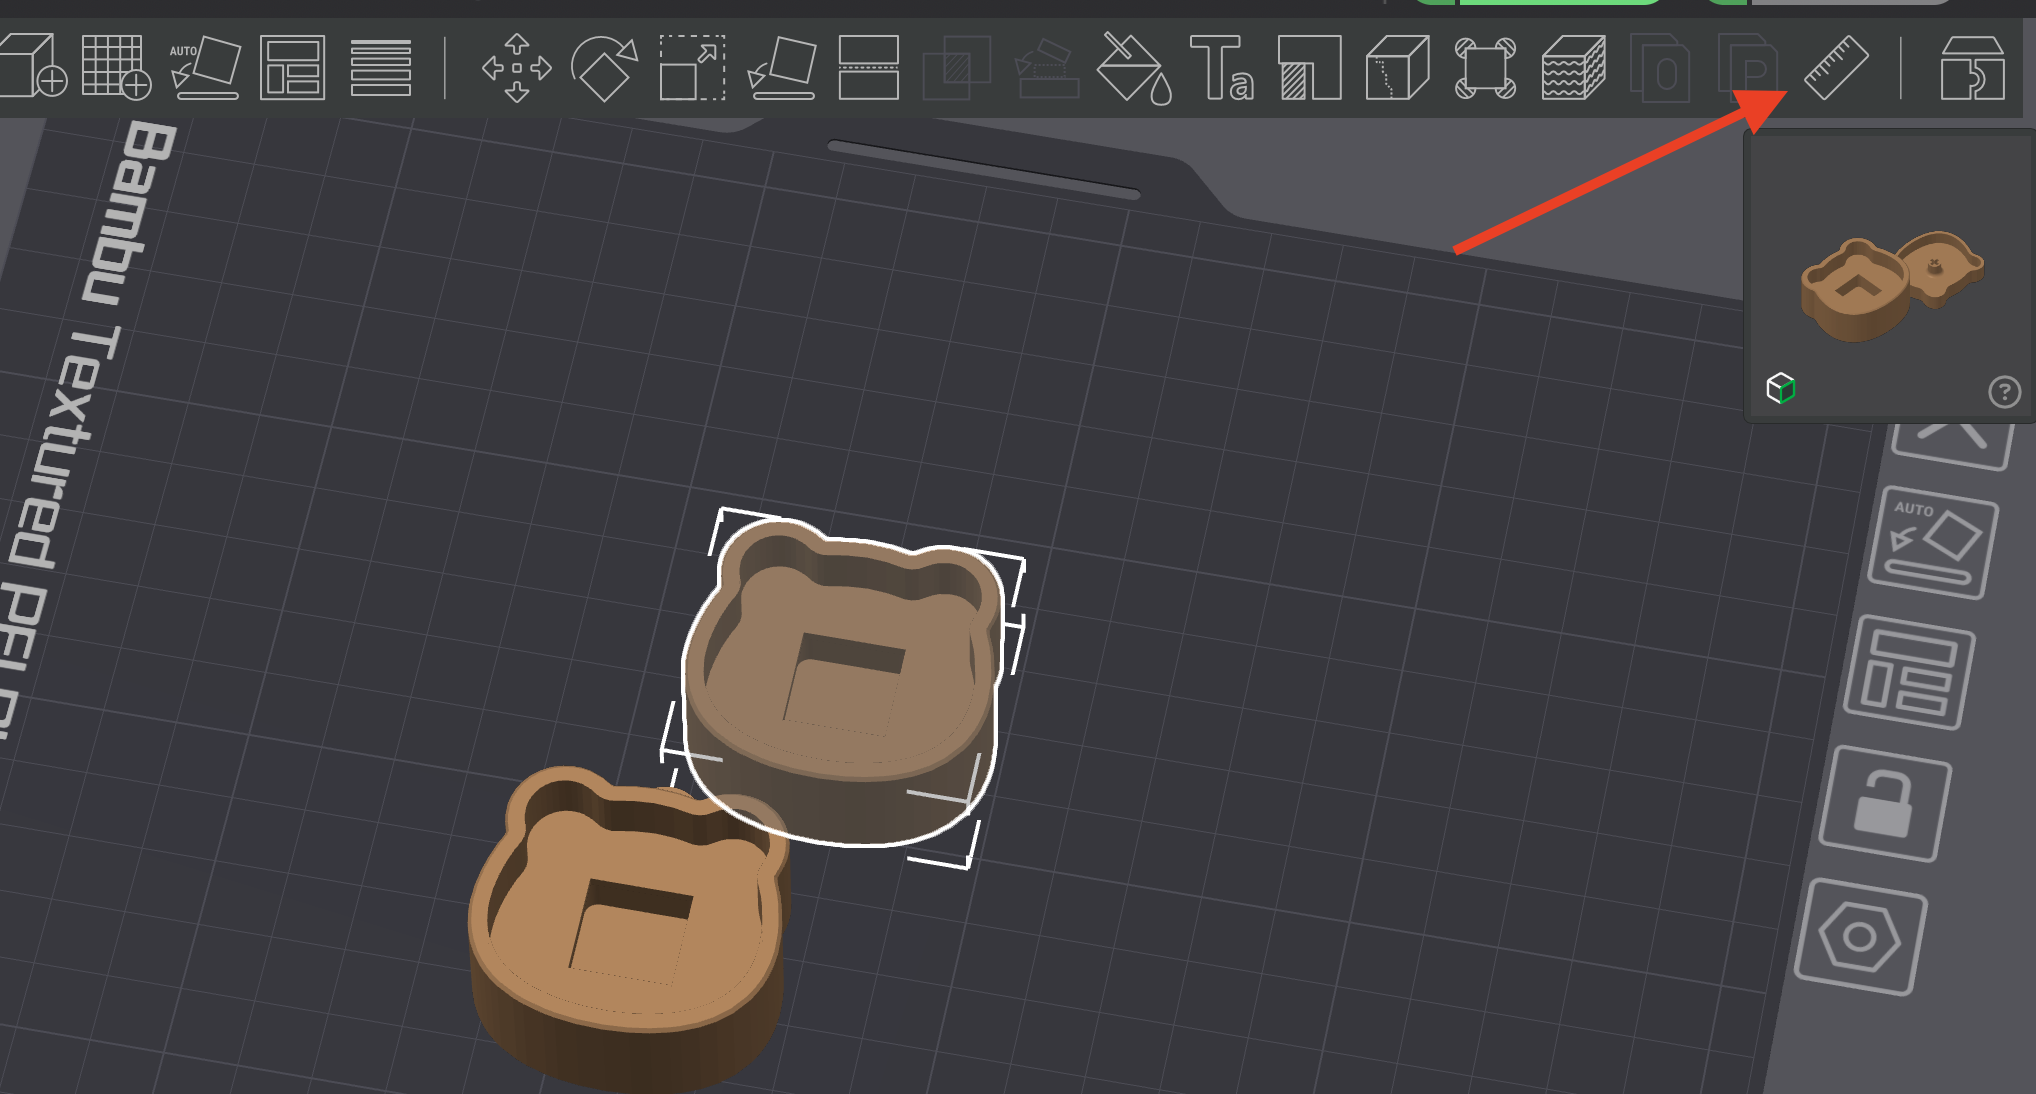
Open the model in Bambu Studio and select the cap part that contains the switch socket. This is the part you want to measure and adjust.
2. Measure the Switch Socket
Click the ruler tool, then select the top and bottom edges of the socket cutout.
Be careful with the second selection. Select the top edge of the lower cutout line, not the lower edge below it. The measurement you want is the socket opening that the switch needs to fit into.
Many model creators choose a socket cutout around 14.0 mm or slightly larger because it makes first test prints easier to assemble and less frustrating to try. That can be useful for quick testing, but it may not be the best long-term carry fit because a looser cap can work free on a bag or keychain.
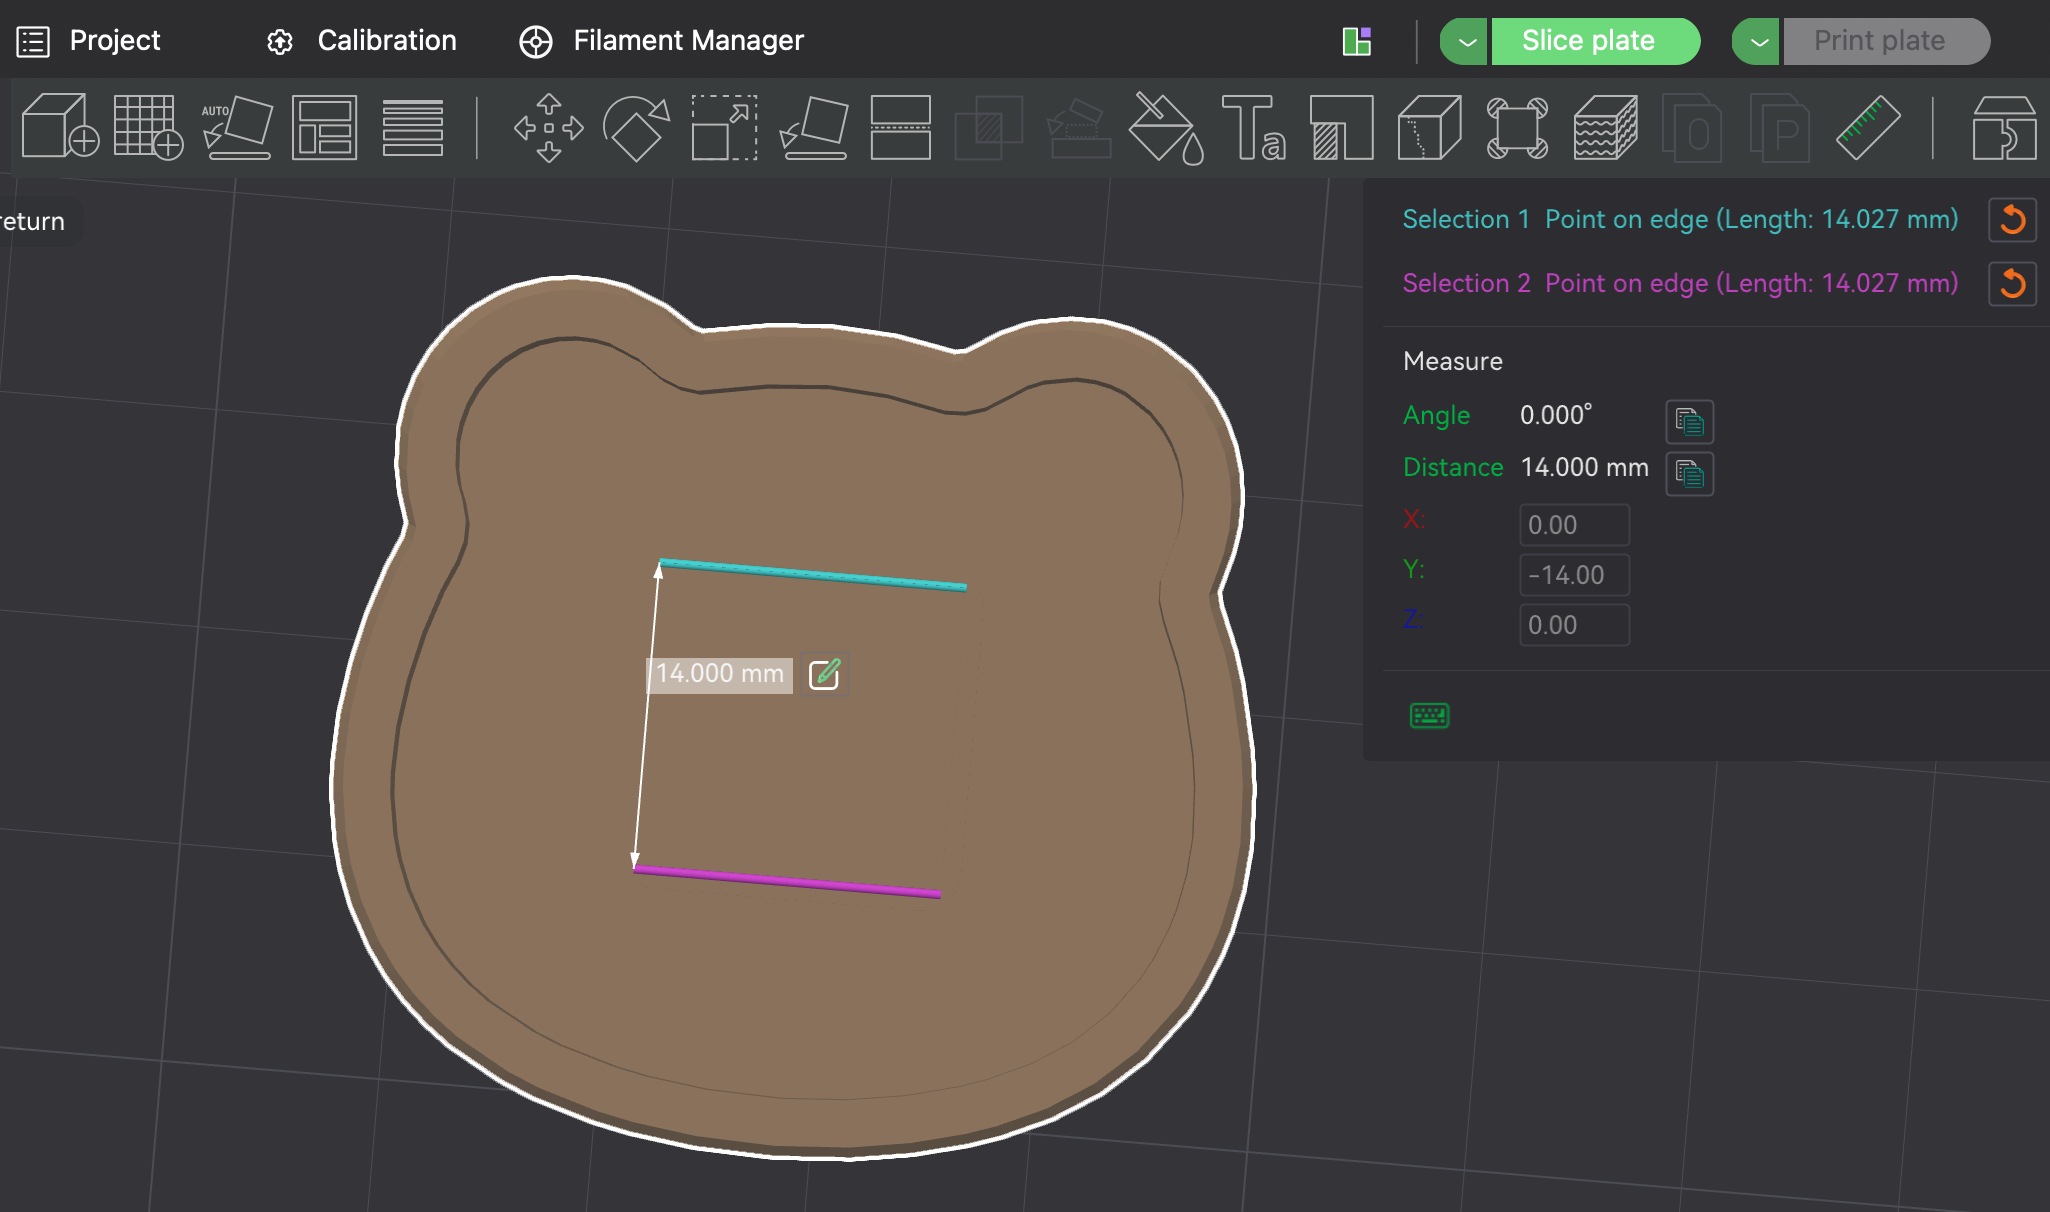
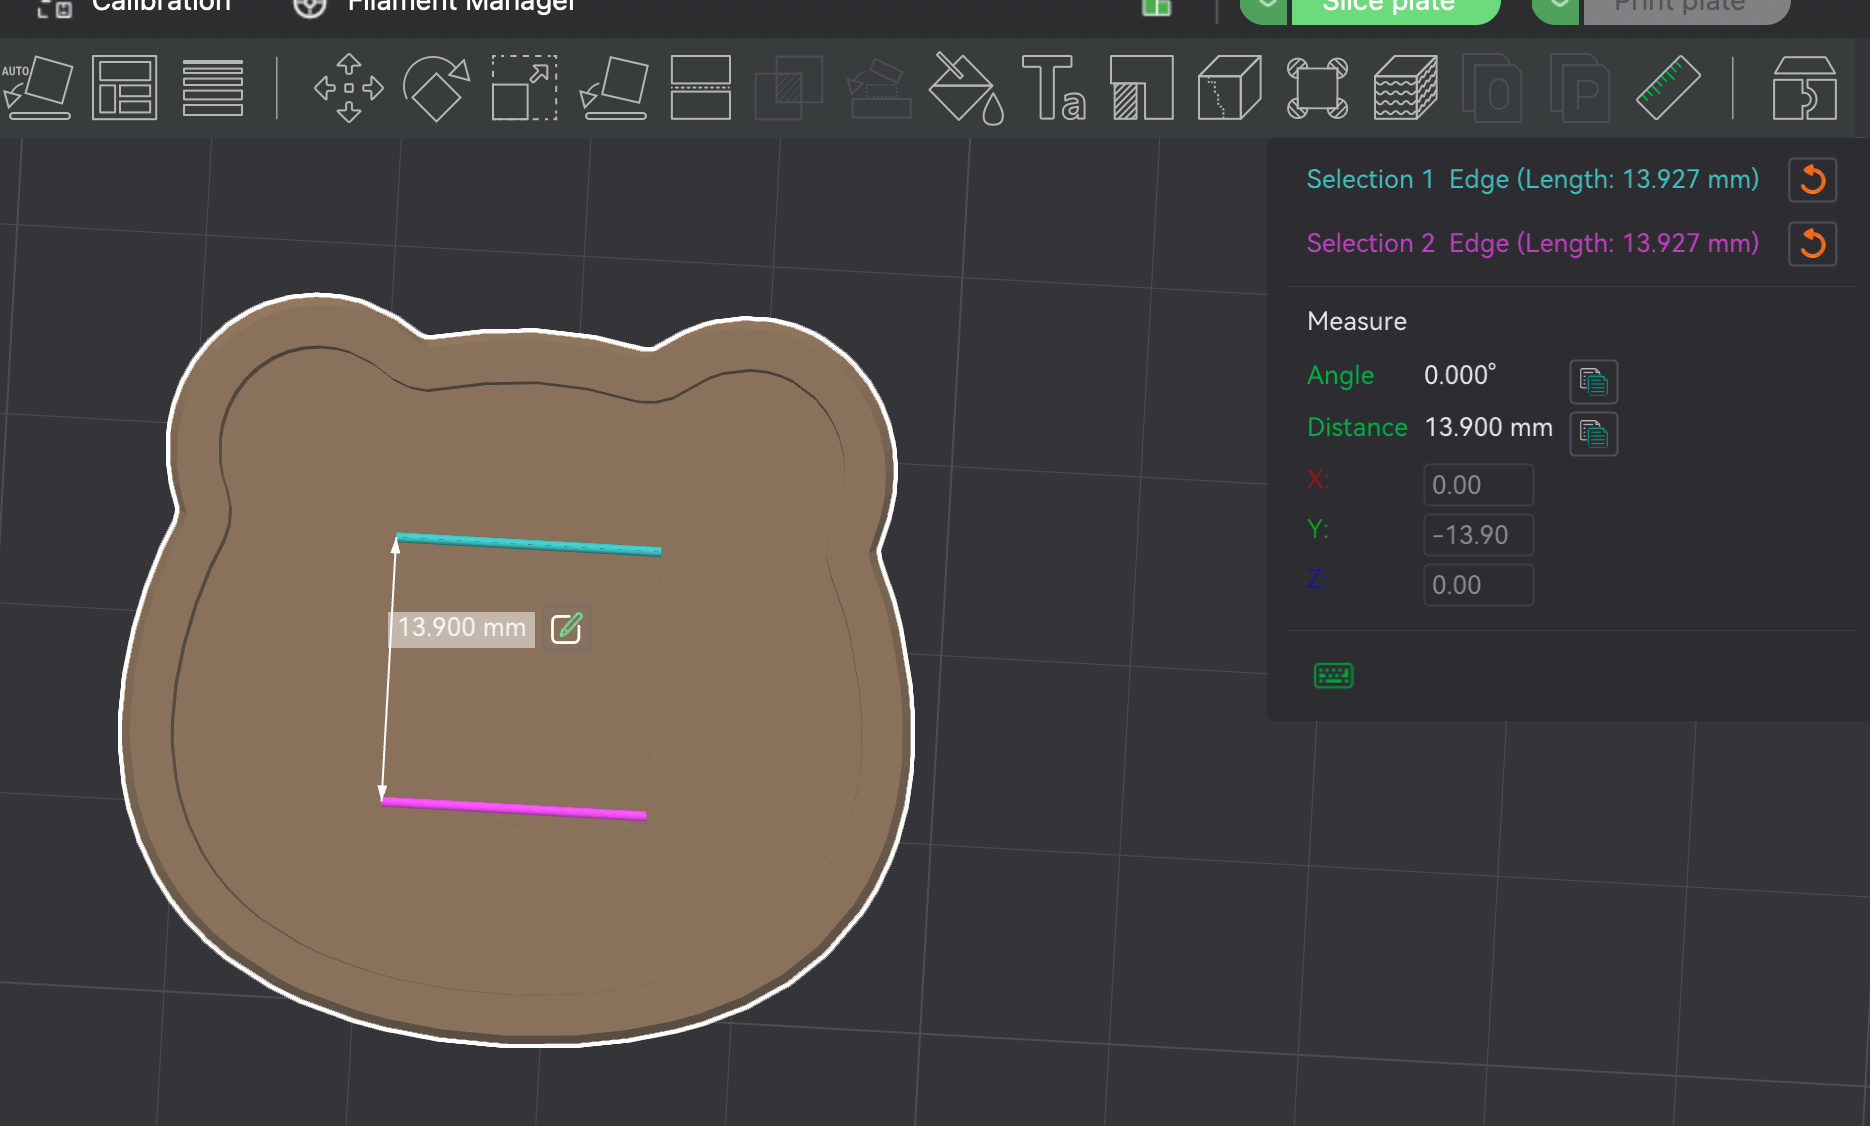
Start around 13.9 mm. A sensible tuning range is usually 13.8 mm to 14.0 mm, but the exact value depends on your printer, filament, slicer profile, and the mechanical switch you are using.
3. Scale the Socket Measurement
After entering the target measurement, click Scale all to apply the change.
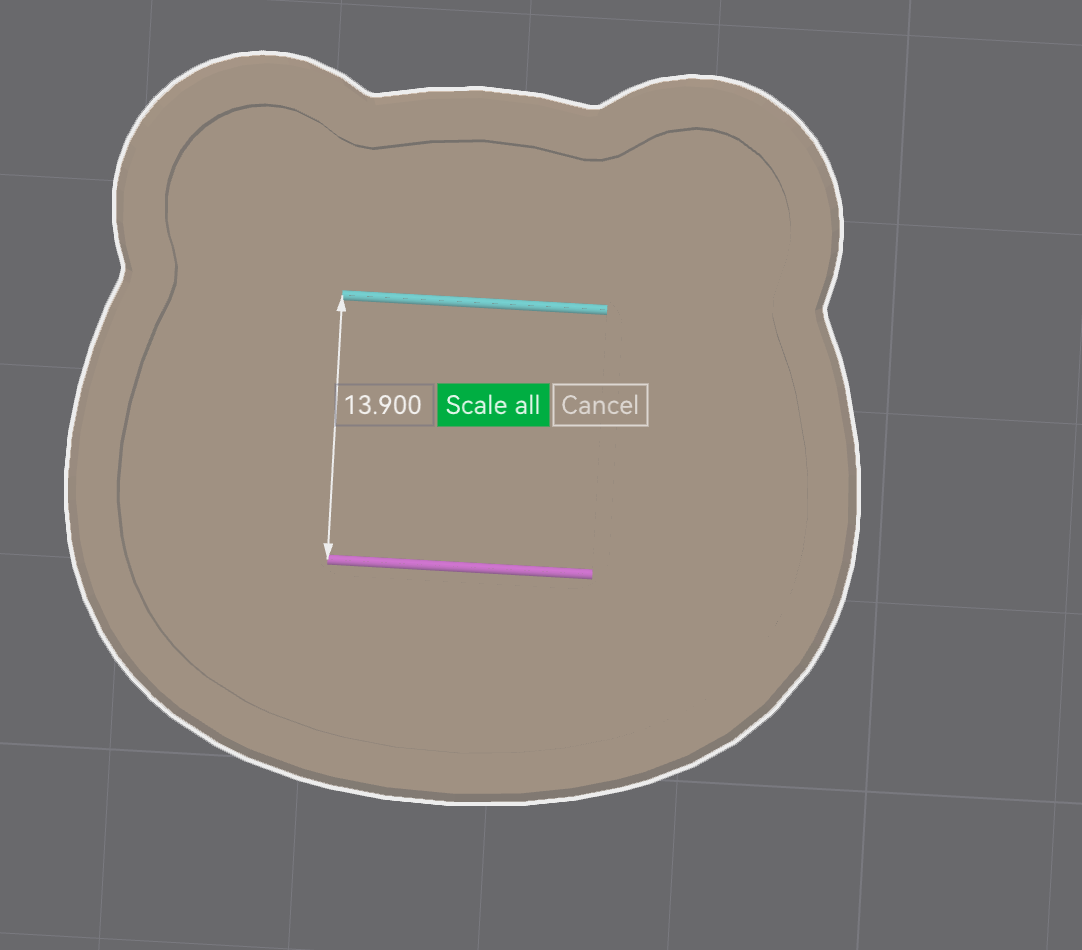
Make small changes and test the fit. If 13.9 mm is too tight, try 14.0 mm. If it is too loose, try 13.8 mm. Treat it like a small binary search until the switch seats cleanly.
4. Check the Fit
The switch fit is good when:
- The switch starts into the socket without shaving plastic.
- You can press it in with light pressure.
- The switch housing does not visibly bend or deform.
- The switch does not fall out when the cap is handled.
If the switch drops in too easily, the fit may feel fine on the desk but loosen during daily use. On a bag or keychain, shaking and knocks can separate the cap from the base, and the top piece may be lost.
5. If Surface Marks or Blobs Show Up
If the fit is good but the outside surface has a visible seam mark or small blob, try Seam position: Back before changing temperature, flow, or compensation settings. The goal is to move the seam away from the visible front face and away from any surface that touches the base during the click.
After slicing, check Preview and follow the seam markers. If the seam lands on the face, ears, switch socket, or moving contact area, move it before printing.
6. If the Switch Stem Is Too Tight
If the switch body fits but the cross or stem area is too tight, use a negative part in Bambu Studio to remove a small amount of material from the cross-shaped socket.
The negative part does not print. It subtracts plastic from the cap, so the outside size of the cap stays the same while the cross-shaped stem opening gets slightly wider.
Add a Small Negative Cross
Work on a duplicate cap or a test plate first. Keep the original cap unchanged until the test print proves the switch fit is better.
- Select the cap part that contains the switch stem.
- Right-click the cap and choose Add negative part > Cube.
- Scale the cube into a thin bar across one direction of the cross.
- Add a second negative cube and scale it into the other direction of the cross.
- Center both bars on the existing cross opening.
- Make sure both bars pass through the stem. They should not float above the cap or sit behind the stem.
For this model, a good first test is two bars that are about 0.1 mm wider than the existing cross slots:
- Horizontal bar: about
4.1 mmlong,1.3 mmwide, and tall enough to pass through the stem. - Vertical bar: about
1.3 mmwide,4.1 mmlong, and tall enough to pass through the stem.
The exact position matters more than the exact height. The bars only need to cut through the part of the stem that grips the switch stem.

After placing the negative parts, slice the plate and inspect the Preview. The grey modifier should disappear as empty space in the toolpath. If it appears as a printed block, it is not configured as a negative part.
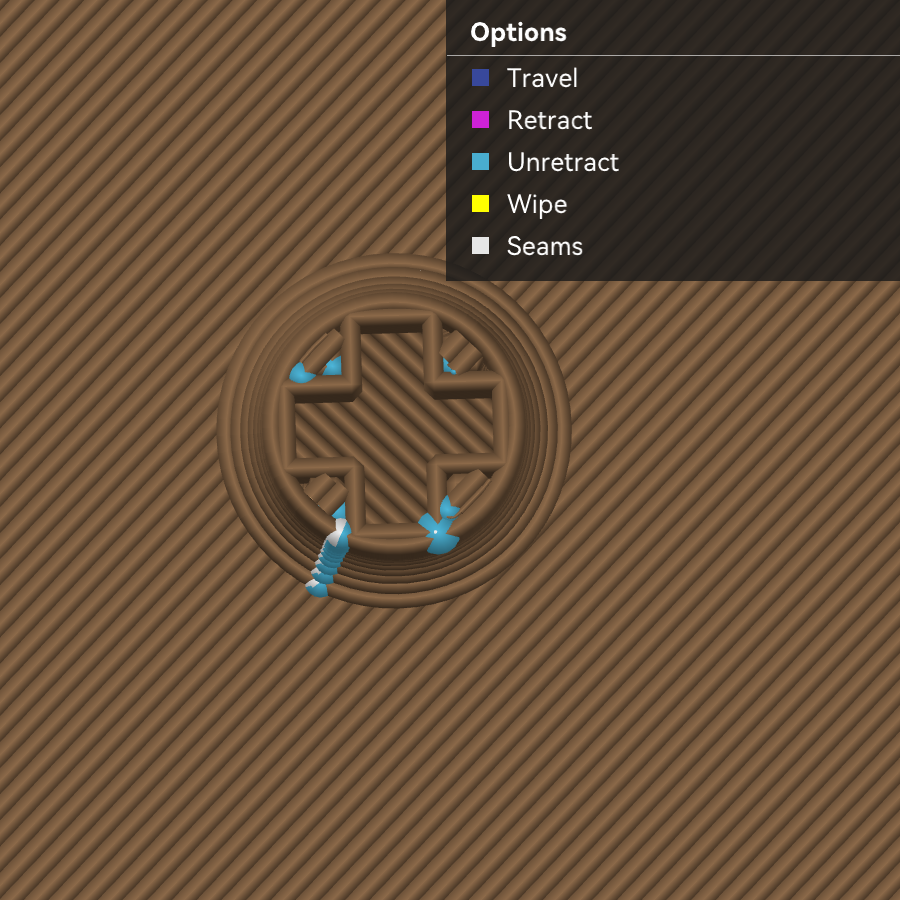
Do not overcut the cross. The goal is still a snug press fit, not a loose fit.
7. If the Whole Fit Is Consistently Too Tight
Use XY compensation only when the whole printed part is consistently too tight, not when one small feature needs local tuning.
In Bambu Studio, find the quality setting for X-Y contour compensation and make a small negative change, such as -0.05 mm. This slightly reduces outside contours in the XY plane. If holes or sockets are consistently too small, use X-Y hole compensation instead and start with a small positive change, such as 0.05 mm.
Print one test after each change and measure the socket again. If only the switch cross is tight, use the negative-part method instead of changing XY compensation for the whole part.
8. If the Cap Wall Rubs the Base
If the switch fits but the cap wall rubs against the base wall, adjust the cap instead of continuing to enlarge the switch socket.
The simplest Bambu Studio fix is to select only the cap part and use uniform scaling:
- Try
99%first. - If it still rubs, try
98%. - If the cap becomes loose, move back toward
99%and tune the socket separately.
This change is small enough that you may not see much difference by eye, but it can stop the cap wall from scraping the base.
Recommended Starting Point
For a first test, use:
- Socket measurement:
13.9 mm - Switch cross adjustment: none
- Cap scale:
100%
Then adjust only one thing at a time:
- Switch too tight: increase the socket slightly or enlarge the cross by about
0.1 mm. - Switch too loose: reduce the socket slightly.
- Cap rubbing base: scale only the cap to
99%, then98%if needed. - Visible seam mark: set the seam position to back.
- Whole part consistently too tight: test a small XY compensation change.
Write down each change and result. Once you find the fit that works for your printer and switch, reuse that value for the next print.